When current homeowners think about selling their home, they usually understand the importance of market conditions, listing the home in as many places as possible, and basic staging strategies like clearing the home of clutter. But there’s one often overlooked skill that can make a big difference in how quickly your home sells—photography.
Spending the extra time to learn how to photograph your home, or working with a professional photographer can help your home sell weeks faster—and might even net you a higher sale price.
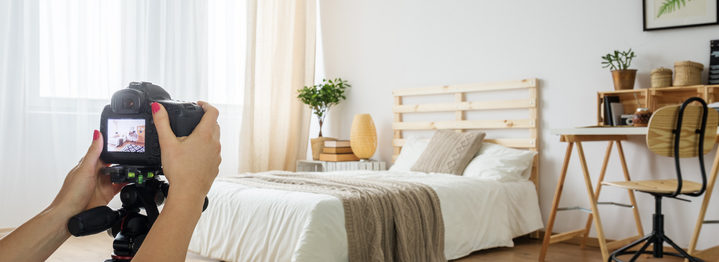
Why Photography Is Important When Selling a Home in Texas
Why is photography so important? You’ll need photos when listing the home, no matter where you list it, and those photos are almost always the first thing prospective homebuyers see.
- First impressions. Today’s homebuyers look at photos of houses long before they visit them in person. If your photos don’t leave them with a good impression, they might never visit your home—and it will never enter into serious consideration for purchase.
- Online viewings. More than half of all homebuyers now find their eventual homes online, where photos are all they have to go on. Having solid photos can make a big difference in whether people give your home serious consideration.
- Competition. Every homeowner attempts to use photos to show off what makes their property unique, and photos make it easy to do side-by-side comparisons. With such strong competition, having lackluster photography could result in a major loss.
Photography Tips for Selling a Home
So what tips can you use to take better photos for your house? You can start by learning the basics of photography, but if you don’t have the time to study the art, you can use these strategies as a good intro for home-specific photography:
- Invest in a good camera (and preferably, a good photographer). If you have the budget for it, you should hire a professional photographer. There’s no substitute for experience, so if you can afford to have someone take professional-grade photos of your home, you should go this route. Otherwise, make sure you’ve invested in a good, high-resolution camera. If you rely on the camera on your smartphone, your photos aren’t going to look nearly as attractive.
- Use bright light whenever possible. Lighting will make or break your photos. For the most part, brighter light is better. Not only does it make your home seem warmer and more inviting, but it will also highlight some of your home’s best features. If you have large, open windows, make use of natural light by taking pictures on the afternoon of a sunny day. If not, make sure you have bright LEDs installed or use peripheral types of lighting to get the right shots.
- Take a few dusk shots. That said, you might want to snap a few dusk shots, especially of the exterior of your home. Dusk can be tricky to work with regarding lighting, but it can frame your home with an almost mystical glow. It will also set your home apart from the millions of competitors who are only showing their property in the middle of the day.
- Stage the home before photographing. This should be obvious, but before your photoshoot, stage your home the best you can. You’ll want to get rid of any clutter, remove all but the most important pieces of furniture, put away any personal items that aren’t universally appealing, and eliminate any trace of pet presence. That way, nothing in your shots will turn people away immediately.
- Aim for a universal appeal. While you’re at it, aim for a universal appeal. If you have esoteric art hanging on your walls, try to replace it with something more neutral. Instead of using artistic angles in your photography, try something a little more conventional.
- Add tasteful elements of color. Photos catch the eye easier and are more memorable when they have a strong splash of color in the mix. To achieve this, you could put a colorful bouquet of flowers on your dining room table, or have a basket of colorful fruits in the kitchen. It’s a small change that can make your photos stand out—and make your home seem more impressive.
- Take photos from doorways. If you’re not used to taking photos, you might be tempted to take photos while you’re in a room, but it’s much more effective to take photos from a doorway. This angle will give viewers the sense that they’re walking into the room, and will show as much of the room as possible in a single shot.
- Experiment with different angles and positions. Do experiment with different angles, and with taking photos from different positions in the house—even if you don’t think they’ll turn out well. When you’re reviewing photos later, you might be surprised at which ones work best, and you’ll be glad you took a chance on the unconventional approach.
- Always take extra photos. While you’re at it, always take more photos than you think you need. There’s virtually no downside to the extra photos, other than a few extra seconds of your time, and they’ll give you more choices when it comes time to select which photos are included on your listing.
- Tweak your photos to perfection. If you’ve never edited a photo before, Photoshop might seem intimidating, but you can learn some of its most basic features in half an hour or less. After you’ve selected some of your best contenders, open them to editing, so you can adjust the frame, the lighting, and other features. Sometimes, a few tweaks are all it takes for a “good” photo to become a great one.
If you need to sell your house as quickly as possible, or if you just don’t want to deal with the effort of listing your home manually, make sure you work with one of Green Residential’s talented and experienced home selling agents. Contact us today to learn more about how we can help you sell your home!
Jorge is one of Green Residential’s Realtors. He is responsible for overseeing various leasing and sales activities. He has worked in the customer service and sales industry for 15 years.
Latest posts by Jorge Lopez
(see all)